Start here: log in
-
Login screen background images
The background images used for the Collections Login page are stored in the
..\Content\Backgrounds\Loginfolder of your Collections installation.It is possible1 to use your own images for the Collections Login page:
Application Administrators (with access to the Collections installation directory) need to create a
Customfolder:..\Content\Backgrounds\Customin which to hold the custom background images (either
.jpgor.png).When Collections loads, the
Customfolder is checked first and any images stored there will display; if theCustomfolder does not exist or it contains no images, the images in theLoginfolder are used.Note: Do not replace the images in the
..\Content\Backgrounds\Loginfolder as the images in this folder may be overwritten when Collections is updated. -
Multi-factor authentication setup in Collections 3.0
Multi‑factor authentication (MFA) for access to Axiell Collections (where a username and password are entered and an email is then received with a verification code) is still available in Collections version 3, however Application Administrators will need to update the MFA settings. Details here.
If getting started with Axiell Collections seems daunting, don't panic. Take a moment to understand these four key concepts about Collections and you will find that the application is far less complex than it may appear at first glance:
- Records: a record contains the information you need to know about an item in your collection, an important person, a storage location in your organization, and so on.
- Data sources: different types of records are stored in different data sources
 The management of a collection can involve a vast amount of information about objects / items / books, people and organizations, events, administration and more. This information is stored as records in data sources. Each data source stores a specific type of information: details about collection items, people, events, loans, and so on., each designed to store a specific type of information:
 - Records for people and organizations involved in some way with your collection are held in Persons and institutions;
- Records for places and containers where your collection items can be found are held in Locations and containers; and so on.
You will find more details about data sources here.
-
Fields: records are made up of fields. Each field holds a single piece of information: the creator of an object, the date an object was created, the material it was made from, and so on.
Fields can behave differently depending on the information they hold: a date field is used differently from a field that holds a title, for example.
The more fields there are in a record, the easier it is to search for, report on, and edit your data.
You will find details about different types of field here.
- Links: an important type of field is the Linked field A type of field used to link one record to another. A Linked field is a drop list of values (records that the field can link to). When a link is made, the field stores a reference to the linked record (a linkref)., which we use to link related records in different data sources together.
For instance, details about a museum item are recorded in the Object catalogue, and details about the item's creator are recorded in Persons and institutions; these two records are linked using a Linked field in the Object catalogue record called creator (VV). Once the records are linked, we can run a search in the Object catalogue for objects created by an artist whose details are recorded and maintained in Persons and institutions.
Linking records saves time and can help improve the quality and consistency of your data: for instance, data about the creator can be entered once and then linked wherever it is required; any changes to that data only need to be made in one location, a record in Persons and institutions in this case.
You will find details about linking records here.
As you start working with Collections you will see that there are hundreds or even thousands of fields, but you will find that they all have the same few basic behaviours: numerous fields can be linked together, but they are all linked in the same way for instance. Once you understand how to work with a small part of Collections, you will be able to use the entire application.
All you need to know about working with Collections can be found in this Help, and if more assistance is required, our Support team is there for you.
Log in and out of Collections
Axiell Collections is a web-based Collections Management System (CMS), and to access it you need its web address (URL) and a web browser.
Tip: Your Application Administrator can provide you with the URL for your organization's Collections installation. They can also provide you with your login credentials and will advise if you need to include a domain with your username (e.g. axiell\gerard).
When you navigate to your organization's Collections installation, a login screen will display. How you log in will depend on your version of Collections.
The login screen requests a username and password:
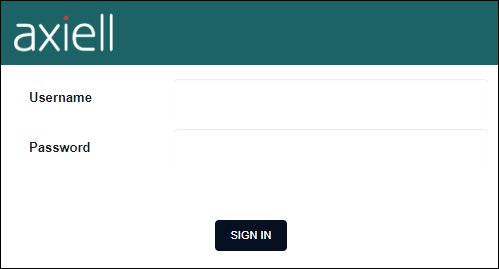
- Enter your Collections username and password.Your username is the key to working with Axiell Collections
Axiell Collections features a comprehensive and granular access rights system based on roles (also called user groups). All users have an account identified by a unique username, and every account is assigned to a role. Access to every aspect of Collections from data sources
The management of a collection can involve a vast amount of information about objects / items / books, people and organizations, events, administration and more. This information is stored as records in data sources. Each data source stores a specific type of information: details about collection items, people, events, loans, and so on. to fields, functionality and more is determined by the permissions assigned to this role.When you log in to Collections all of the permissions assigned to you are assessed and the system is customized accordingly.
You can read about roles and access rights here.
Forgot your password?Information for Application AdministratorsDetails about configuring this function can be found here.
If enabled in your system, a Forgot your password? link will display on the login screen, allowing you to reset your password:
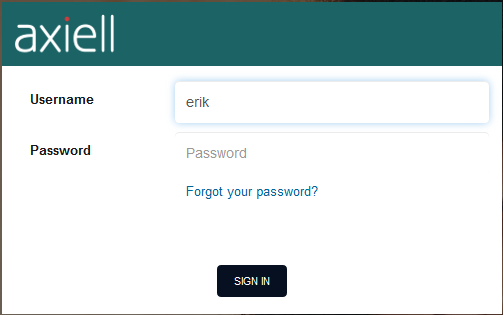
Note: If your Collections system has been set up to use Active Directory authentication, this will change the user's Windows password.
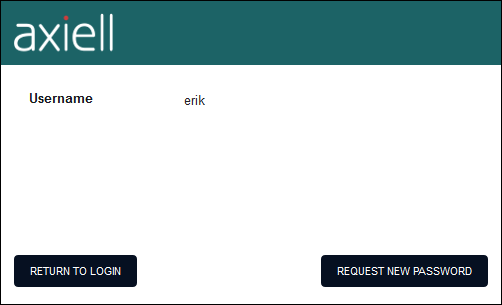
- Click the link to display a second login screen in which you enter or confirm your user name and then click Request new password:
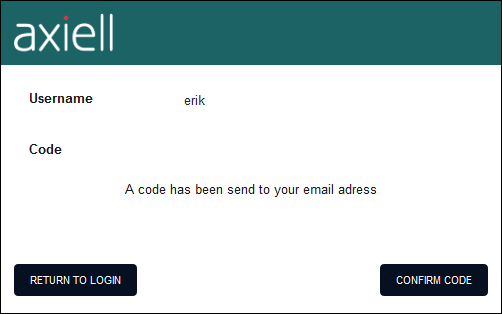
- A third login screen will display and a code is emailed to you; copy and paste the code into the Code field:
- When Confirm code is clicked a final login screen displays in which you enter your new password (twice):
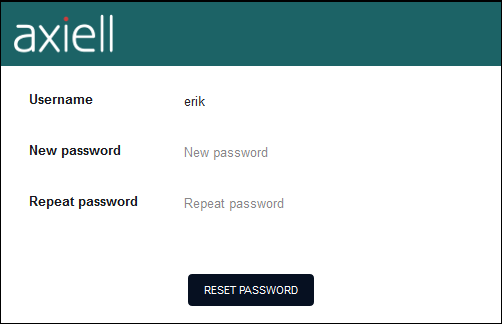
- Click Reset password to confirm the change.
Change your passwordThe Account option in the Main menu may include an option to change your password. This option is not available by default and is only possible if Active Directory
is used by your organization to manage permissions and access to Axiell Collections: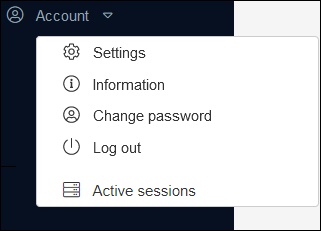
If this option is available, you can change the password you use to log into Axiell Collections.
Note: If you are using Active Directory credentials to log into Axiell Collections, using this option will change your Windows password.
- Select Account>Change password from the Main menu.
The Change password box will display:

- Complete all fields and select OK.
A message will indicate the success or failure of the password change.
- Click the link to display a second login screen in which you enter or confirm your user name and then click Request new password:
-
Click Sign in.
If Two-factor authentication is enabled in your system, you will be asked to provide a one-time unique code:
Two-factor authentication
Information for Application Administrators
Details about configuring this function can be found here.
If enabled in your system, you will be required to provide a one-time unique code as well as your password when logging in to Collections.
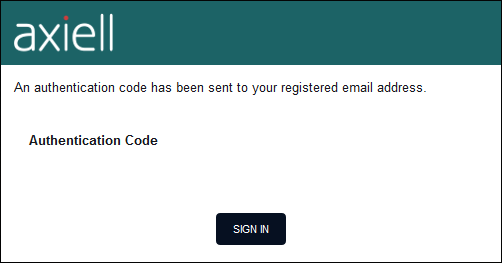
When you click Sign in a second login screen displays and you will receive an email with an authentication code:
- Copy the code and paste it into the Authentication code field:
-
Click Sign in on this screen to log you into Collections.
- Copy the code and paste it into the Authentication code field:
Logging in is typically a two step process:

Tip: If the Login screen does not include a Username field, your Application Administrator has probably enabled Single Sign-On (SSO). Details below.
-
Enter your username (preceded by a domain if required in your system, e.g.
axiell\gerard) and select Next to open the Password screen:
Your username (and domain name if entered) will display, as well as the authentication method used (e.g.
Active Directory / LDAP).Your username is the key to working with Axiell Collections
Axiell Collections features a comprehensive and granular access rights system based on roles (also called user groups). All users have an account identified by a unique username, and every account is assigned to a role. Access to every aspect of Collections from data sources
The management of a collection can involve a vast amount of information about objects / items / books, people and organizations, events, administration and more. This information is stored as records in data sources. Each data source stores a specific type of information: details about collection items, people, events, loans, and so on. to fields, functionality and more is determined by the permissions assigned to this role.When you log in to Collections all of the permissions assigned to you are assessed and the system is customized accordingly.
You can read about roles and access rights here.
-
Enter your password and select Next to log in.
The following options are available on these two Login screens:
|
Option |
Type |
Details |
|---|---|---|
|
Language |
Button |
Select the button to change the Interface language; the current language is named in the button, e.g.: |
|
I can’t access my account |
Link |
Select this option if you are having trouble logging in. A support page will open in another browser tab (either the Axiell Support page or a support page set up for your institution). |
|
Remember me on this computer |
Checkbox |
Select the checkbox to save your login credentials - your username and the associated authentication method - to this computer as a profile. The I want to sign in with a different account option will then be enabled. Note: If the Remember me on this computer option is not available, it may have been disabled by your Application Administrator. |
|
I want to sign in with a different account |
Link |
This option is useful if you log in to this instance of Collections with different user credentials. It is enabled if at least one user profile has been saved by selecting the Remember me on this computer checkbox. Click the link to display a list of user profiles (username and the associated authentication method); select a profile and then select Confirm to load the profile and display the Password screen. Note: A profile can be deleted from the list by selecting the Trash icon alongside a profile name: Profiles do not store passwords and you will always be required to enter the password of the selected profile on the Password screen. |
|
|
|
Displays in the Password field as you enter a password. By default, passwords are unreadable:
but can be viewed by clicking
Note that when the eye icon is selected and it changes to |
|
I forgot my password |
Link |
When configured by your Application Administrator, this option can be used to reset a forgotten password. Application Administrators will find details in the Designer Help. Note: The password reset functionality is not yet (19 December 2025) functional in Collections 3.0. |


Single Sign-On (SSO)
Application Administrators can configure Collections for automatic login via a third-party authentication service, aka Single Sign-On (contact Axiell Support for details). In this case the Login screen will include a button labelled Sign in with (and the name of the authentication service), for example:

Tip: Application Administrators can personalize the Collections Login page images. Details above.
You are logged in to Axiell Collections.
Note: If the Select application dialogue automatically opens when you log in, you are working in a multi-tenancy environment2 (common in large organizations that host multiple institutions, each running its own instance of Collections). You will need to select which application to open. Details here.
To begin working with your collections data, select an option from the Main menu:

When you are finished working with Collections it is good practice to log out: do not simply close the browser tab in which you were working or close the browser itself.
Not only is it more secure to log out rather than simply to close the browser or tab, your licence is immediately freed-up and available to other users in your organization.
Always log out of Collections securely:
- From the Main menu, select Account.
A sub-menu will display:

-
Select Log out to securely exit Collections.
Select the data source to work with
When you log in to Axiell Collections, the primary feature of the User Interface is the Main menu:

Typically you will want to:
- Add a new record: select New in the Main menu
-OR-
- Search for one or more existing records: select Search in the Main menu.
In both cases the Select data source box will display, listing data sources you are authorized to work with.
In Collections we work in a single data source at a time: we search for records in Persons and institutions for instance, and we edit records in that data source; when we add a new record, the first thing we do is select the data source to which the record will be added. Although we work in a single data source, we have access to information in many other data sources because records in different data sources are linked together (details above).
The Select data source box is a little different when adding and searching records (explained here), but the principle is the same in both cases: we must first select which data source we want to work with.
Here we see the Select data source box that displays when searching for records:

Note: From Collections version 1.15 onwards it is possible to customize which data sources are listed in the Select data source box, and in what order. Details here.
To start searching for records or adding a new record, select the data source you wish to work with and click OK or press ENTER.
Full details about:
- Adding a new record can be found here.
- Searching for one or more existing records can be found here.
In Collections we work with records in one or more Display Views, each of which displays in its own pane within the Axiell Collections Window3. Different Views serve different purposes (Help View provides users with a description of a field's purpose and other data entry instructions) or provide a different view of the data in your records (the Media viewer displays all image, video, and audio files linked to the current record).
Each View has its own toolbar with options for working with records in that View. For instance, you typically add and edit records in Record details View and this View's toolbar includes options for adding a new record, editing the current record, adding an occurrence![]() If a field in the current record can have more than one value, we add an occurrence of the field for each value (e.g. a book can have multiple authors so we add an occurrence of the author.name (au) field for each author). An occurrence can be a member of a group of fields, and adding an occurrence of the field adds all members of the group at once. of a field to the current record, and so on.
If a field in the current record can have more than one value, we add an occurrence of the field for each value (e.g. a book can have multiple authors so we add an occurrence of the author.name (au) field for each author). An occurrence can be a member of a group of fields, and adding an occurrence of the field adds all members of the group at once. of a field to the current record, and so on.